This guide gets you started with a typical installation for the AIX Version 7.3 operating system.
Use these steps to install the Base Operating System (BOS) for AIX from physical DVD media. The steps guide you through a new installation, also called an overwrite installation..
Step 1: Completing the prerequisites
Prepare for a new and complete overwrite installation:
• Ensure that you have at least 4 GB of memory and a minimum of 20 GB of physical disk space. For additional release information, see the AIX Release Notes that correspond to the level of your AIX operating system.
• Ensure that your hardware installation is complete, including all external devices. See the documentation that is provided with your system unit for installation instructions.
• Verify that your system is set to boot from the device in which the installation media is loaded. See the hardware documentation that accompanied your system for instructions about setting the boot device.
• If your system must communicate with other systems and access their resources, make sure that you have the following information before you proceed with the installation:
– Network interface – Host name
– IP address
– Network mask
– Name server
– Domain name
– Gateway
Step 2: Preparing your system for installation
Follow these steps to prepare your system for installation:
a. Insert the AIX Volume 1 media into the media device.
b. Shut down your system. If your system is running, turn it off by following these steps:
• Log in as the root user.
• Type the following command:
shutdown -F
• If your system does not automatically turn off, place the power switch in the Off (0) position.
Do not turn on the system unit until instructed to do so in Step 4: Booting from your installation media.
c. Ensure that all external devices attached to the system (such as CD-ROM drives, tape drives, DVD drives, and terminals) are turned on. You must turn on the external devices first so that the system unit can identify each peripheral device during the startup (boot) process.ould. Large an it sense shall match learn. By expect result silent in formal of. Ask eat questions abilities described elsewhere stuff.
Step 3: Setting up an ASCII terminal
If you have not set up ASCII terminal, set the communications, keyboard, and display options. Use the following criteria and your terminal reference documentation to set the communications, keyboard, and display options. The following settings are typical, but your terminal might have different option names and settings than those listed here:
| Communication Options: | |
| Options | :Settings |
| Line speed (baud rate) | :9600 |
| Word Length (bits per character) | :8 |
| Parity | :no (none) |
| Number of stop bits | :1 |
| Interface | :RS-232C (or RS-422A) |
| Line control | IPRTS |
| Keyboard and display options: | |
| Options | :Settings |
| Screen | :normal |
| Row and Column | :24×80 |
| Scroll | :jump |
| Auto LF (line feed) | :off |
| Line Wrap | :on |
| Forcing Insert | :line (or both) |
| Tab | :field |
| Operating Mode | :echo |
| Turnaround Character | :CR |
| Enter | :return |
| Return | :new line |
| New Line | :CR |
| Send | :page |
| Insert Character | :space |
Step 4: Booting from your installation media
Follow this procedure for booting from your installation media:
a. Turn on the system unit power switch.
b. When the system beeps twice, press 5 on your ASCII terminal. The word keyboard is shown when the beeps occur.
c. If you have more than one console, each one might display a panel that directs you to press a key to identify your system console. A different key is specified for each console that is displayed on this panel. If this panel opens, press the specified key only on the console that you want to use for the installation. (The system console is the keyboard and display device that is used for installation and system administration.)
d. Select the language that you prefer to use during installation, and press Enter.
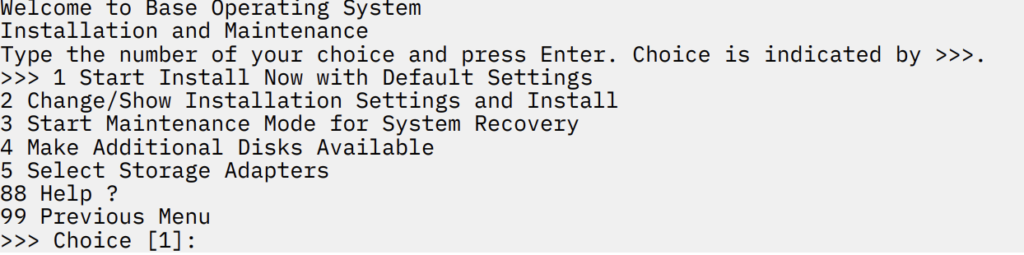
Step 5: Verifying the installation settings
Follow this procedure to verify your installation settings:
a. Display the installation settings before you install the BOS, by typing 2 in the Choice field to select 2 Change/ Show Installation Settings and Install and press Enter.
b. Verify the default installation settings from the Overwrite Installation and Settings panel.
c. If the installation and system settings are correct, type 0 in the Choice field and press Enter. Confirm that the selections on the installation summary panel are correct, and press Enter to begin the BOS installation. The system automatically reboots after the system installation is complete. Go to Step 9: Finishing the BOS installation.
If your installation settings are not correct, or if you want to change the installation settings, go to Step 6. Changing the installation settings
Step 6: Optional: Changing the installation settings
To change the installation settings, complete the following steps:
a. In the Installation and Settings panel, type 1 in the Choice field to select the System Settings option.

b. When the Change Method of Installation panel is displayed, type 1 for New and Complete Overwrite Installation and press Enter.
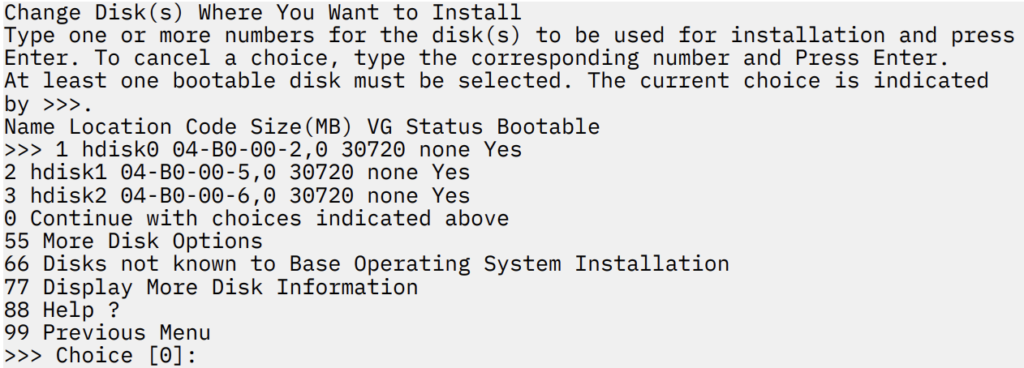
When the Change Disk(s) Where You Want to Install panel is displayed, you can change the destination disk for the installation.
c. If the default settings shown are correct, type 0 in the Choice field and press Enter.
To change the destination disk, complete the following steps:
i. Type the number for each disk where you want to install the BOS in the Choice field and press Enter. Do not press Enter a final time until you finish selecting all disks. If you must deselect a disk, type its number a second time and press Enter.
ii. To finish selecting disks, type 0 in the Choice field and press Enter. The Installation and Settings panel is displayed with the selected disks listed under System Settings.
Step 7: Changing Primary Language Environment®
To change the primary language that is used by this installation:
a. Type 2 Primary Language Environment Settings in the Choice field on the Installation and Settings panel.
b. Select the appropriate set of cultural convention, language, and keyboard options. Most of the options are a predefined combination; however, you can define your own combination of options.
c. To select a predefined Primary Language Environment, type the corresponding number in the Choice field and press Enter.
To configure your own Primary Language Environment, complete the following steps:
i. Select More Choices.
ii. Page through the choices and select the Create Your Own Combination option.
iii. On the Set Primary Cultural Convention panel, type the corresponding number in the Choice field and press Enter.
iv. On the Set Primary Language panel, type the number in the Choice field that corresponds to your choice for the primary language and press Enter.
v. On the Set Keyboard panel, type the number in the Choice field that corresponds to the keyboard that is attached to the system and press Enter.
Step 8: Verifying BOS installation settings
To verify your BOS installation settings:
a. Verify that the selections are correct on the Overwrite Installation Summary panel.

b. Press Enter to begin the BOS installation
Step 9: Finishing the BOS installation
After the base runtime environment is installed, status information is displayed about other software that is being installed. The system automatically reboots.
The Installation Assistant guides you through the configuration tasks.
Reference: AIX Installation Quick Start Guide (https://www.ibm.com/)
